
Manuals & Kits
Live classes may be paused but you can still try your hand at all techniques using these instruction manuals!
Whether you would like to learn off-loom weaving, rock weaving, yarn wrapping, darning or paper weaving, all designs that are taught in the classes are available in step-by-step format below.
The manuals are a photographic guide through each technique from start to finish. Kits will be available again soon.
See below and keep scrolling down to see all categories ;-)
Happy Weaving!

Rock Weaving Manual

Learn how to weave around rocks and other found objects!
Suitable for all levels, including complete beginner.
In this manual you will find:
A guide on how to choose a good rock to weave around
A thorough step by step photographic guide on the process of rock weaving from start to finish, including:
How to wind a warp around a rock,
How to weave into it with needle and thread
How to weave on both sides of your rock
How to create Twill, Hopsack and Zig Zag patterns
How to use stripes to create a colourful check
How to secure the end of your thread once you’re done!
You will need:
scissors
a needle (flat bodkin needles are best but a regular sharp large eyed needle is fine)
an assortment of yarns
a couple of objects to weave around - anything vaguely rectangular or square is fine - rocks, slate, wood, an old cassette tape cover - anything you like!
At checkout you will be able to download a zip file containing the PDF manual and some simulations to print out and use as you go along.
Please Note: This learning content is for your personal use only and is not to be shared, re-sold or used for your own teaching purposes. Thank you ;-)
Off-Loom Weaving Classes 1 & 2
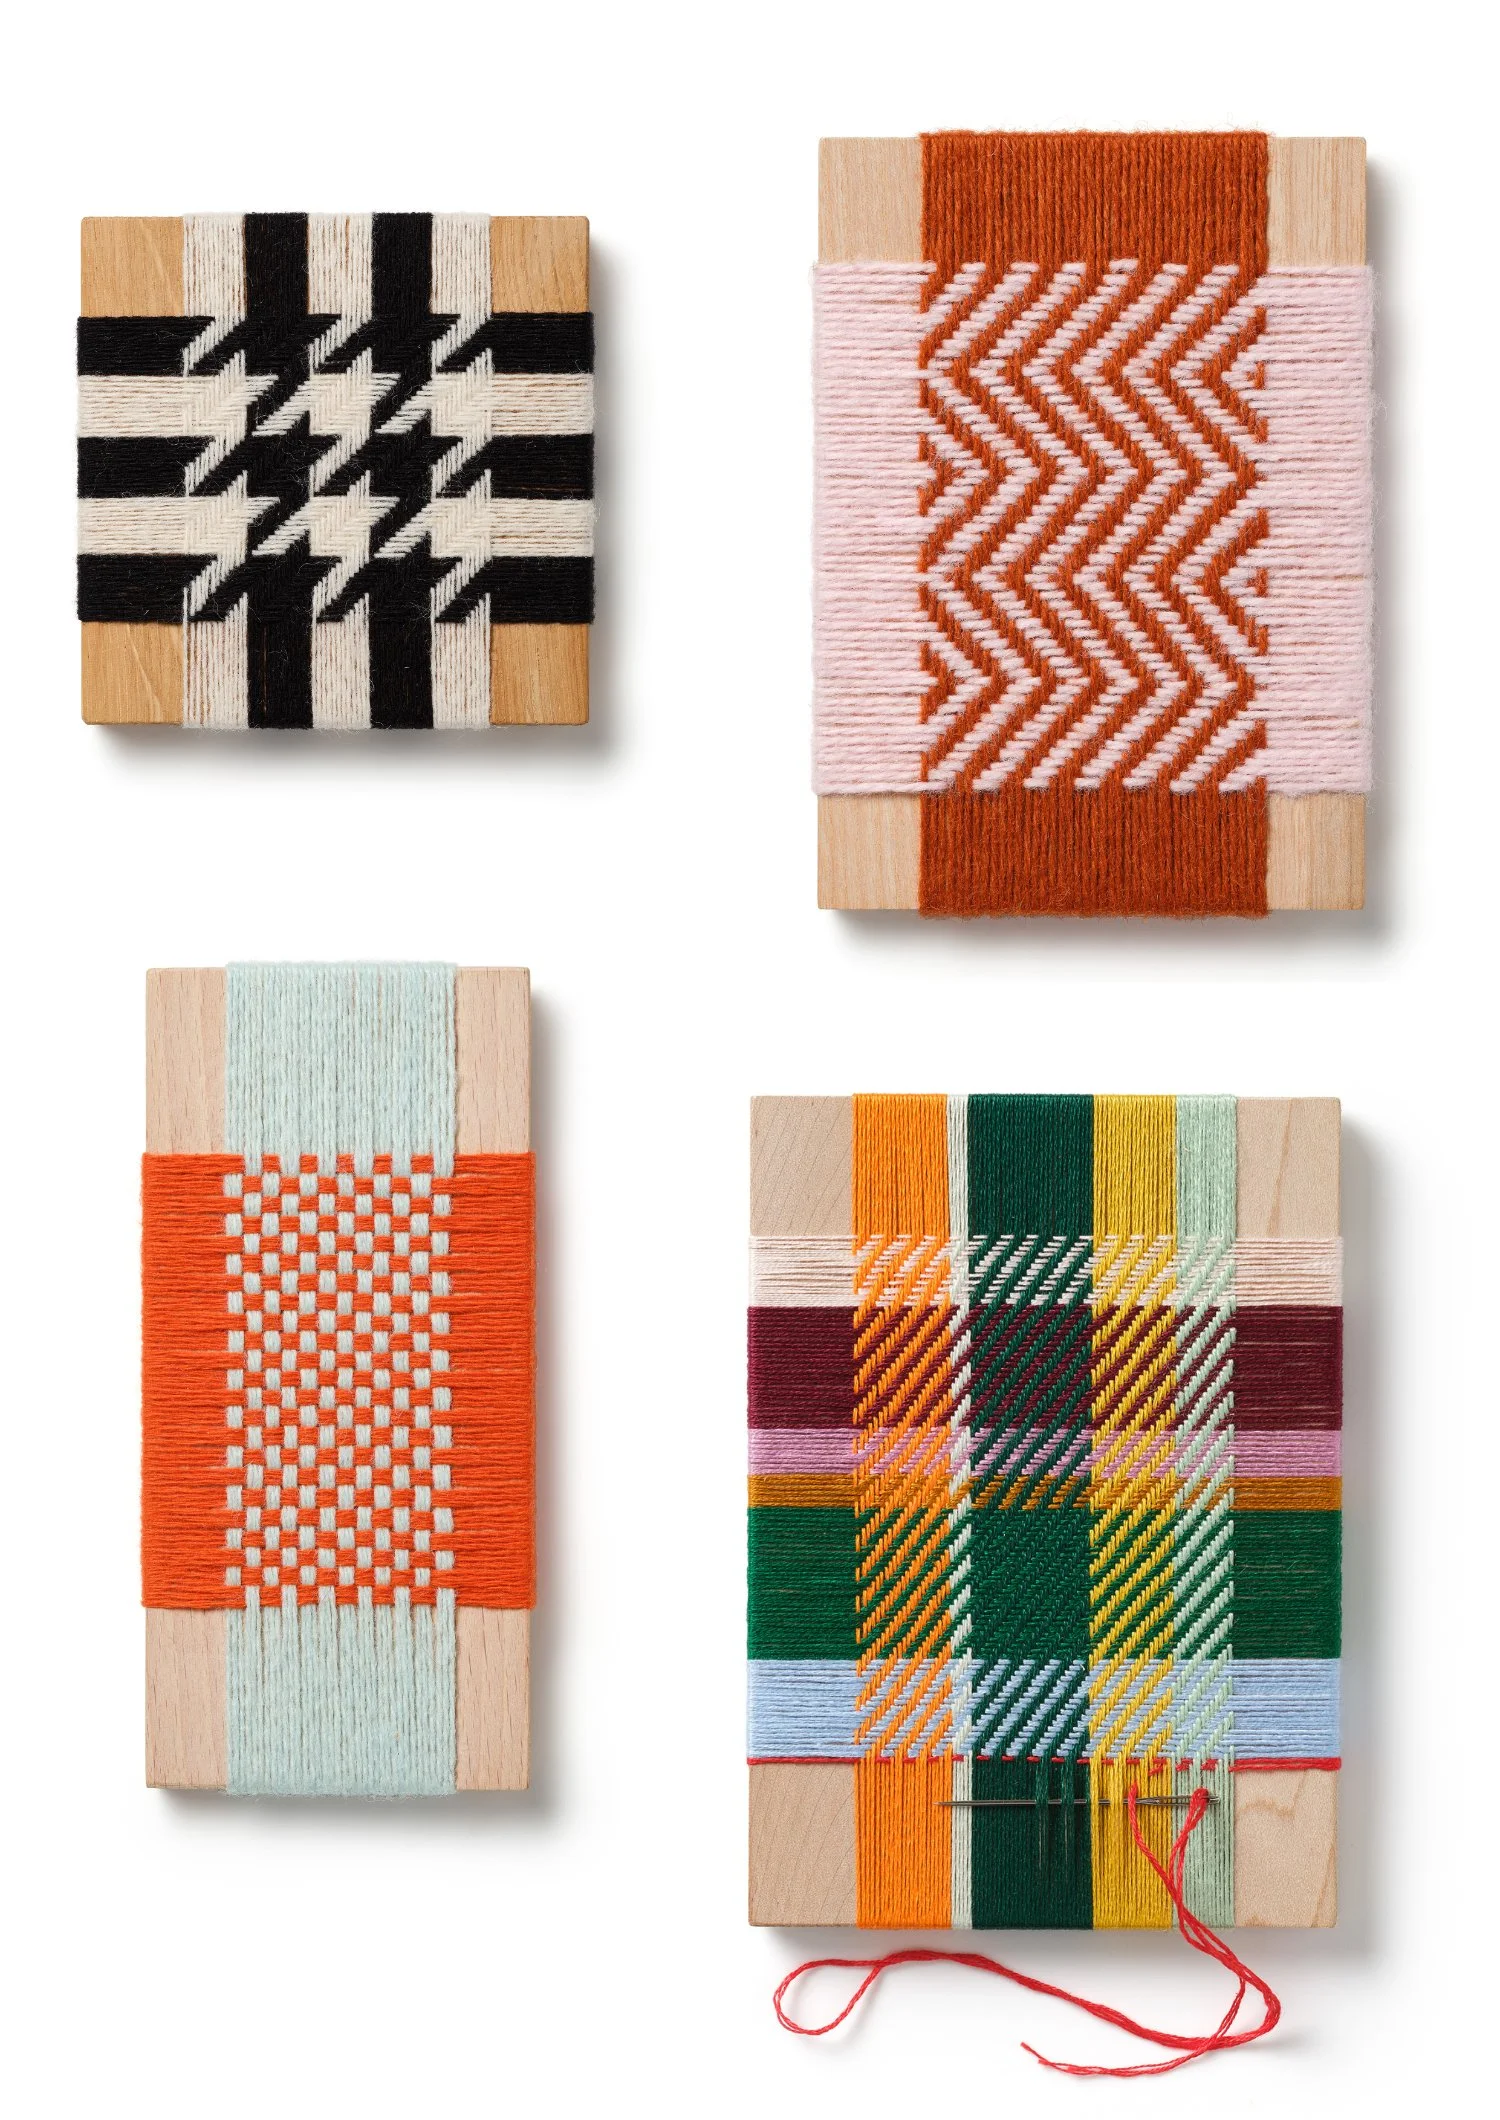
Included in this package are five PDF instruction manuals from Class 1 Off-Loom Weaving:
Hopsack
Twill (adaptable to create a zig zag!)
Dogtooth
Checks & Colour
Steps
Each manual takes you through the process from start to finish, from winding the warp threads around the base, to weaving each row of weft, showing exactly where to put your needle and when, and how to finish.
These patterns are suitable for all levels, whether you are a total beginner or a seasoned weaver.
Start with the simple hopsack or chunky twill, and work your way down the list!
You’ll be amazed by what you achieve, and let me tell you, its quite addictive!
Once you have finished each of these designs, you will be ready for Class 2, should you wish to continue and learn more patterns.
Please Note:
These manuals do not include any videos.
Kits will be available again once I am back from maternity leave ;-)
The manuals are in PDF format and are intended for digital use rather than printing, due to the number of pages.
This learning content is for your personal use only and is not to be shared, re-sold, used for profit or for your own teaching purposes. Thank you ;-)
Happy Weaving!
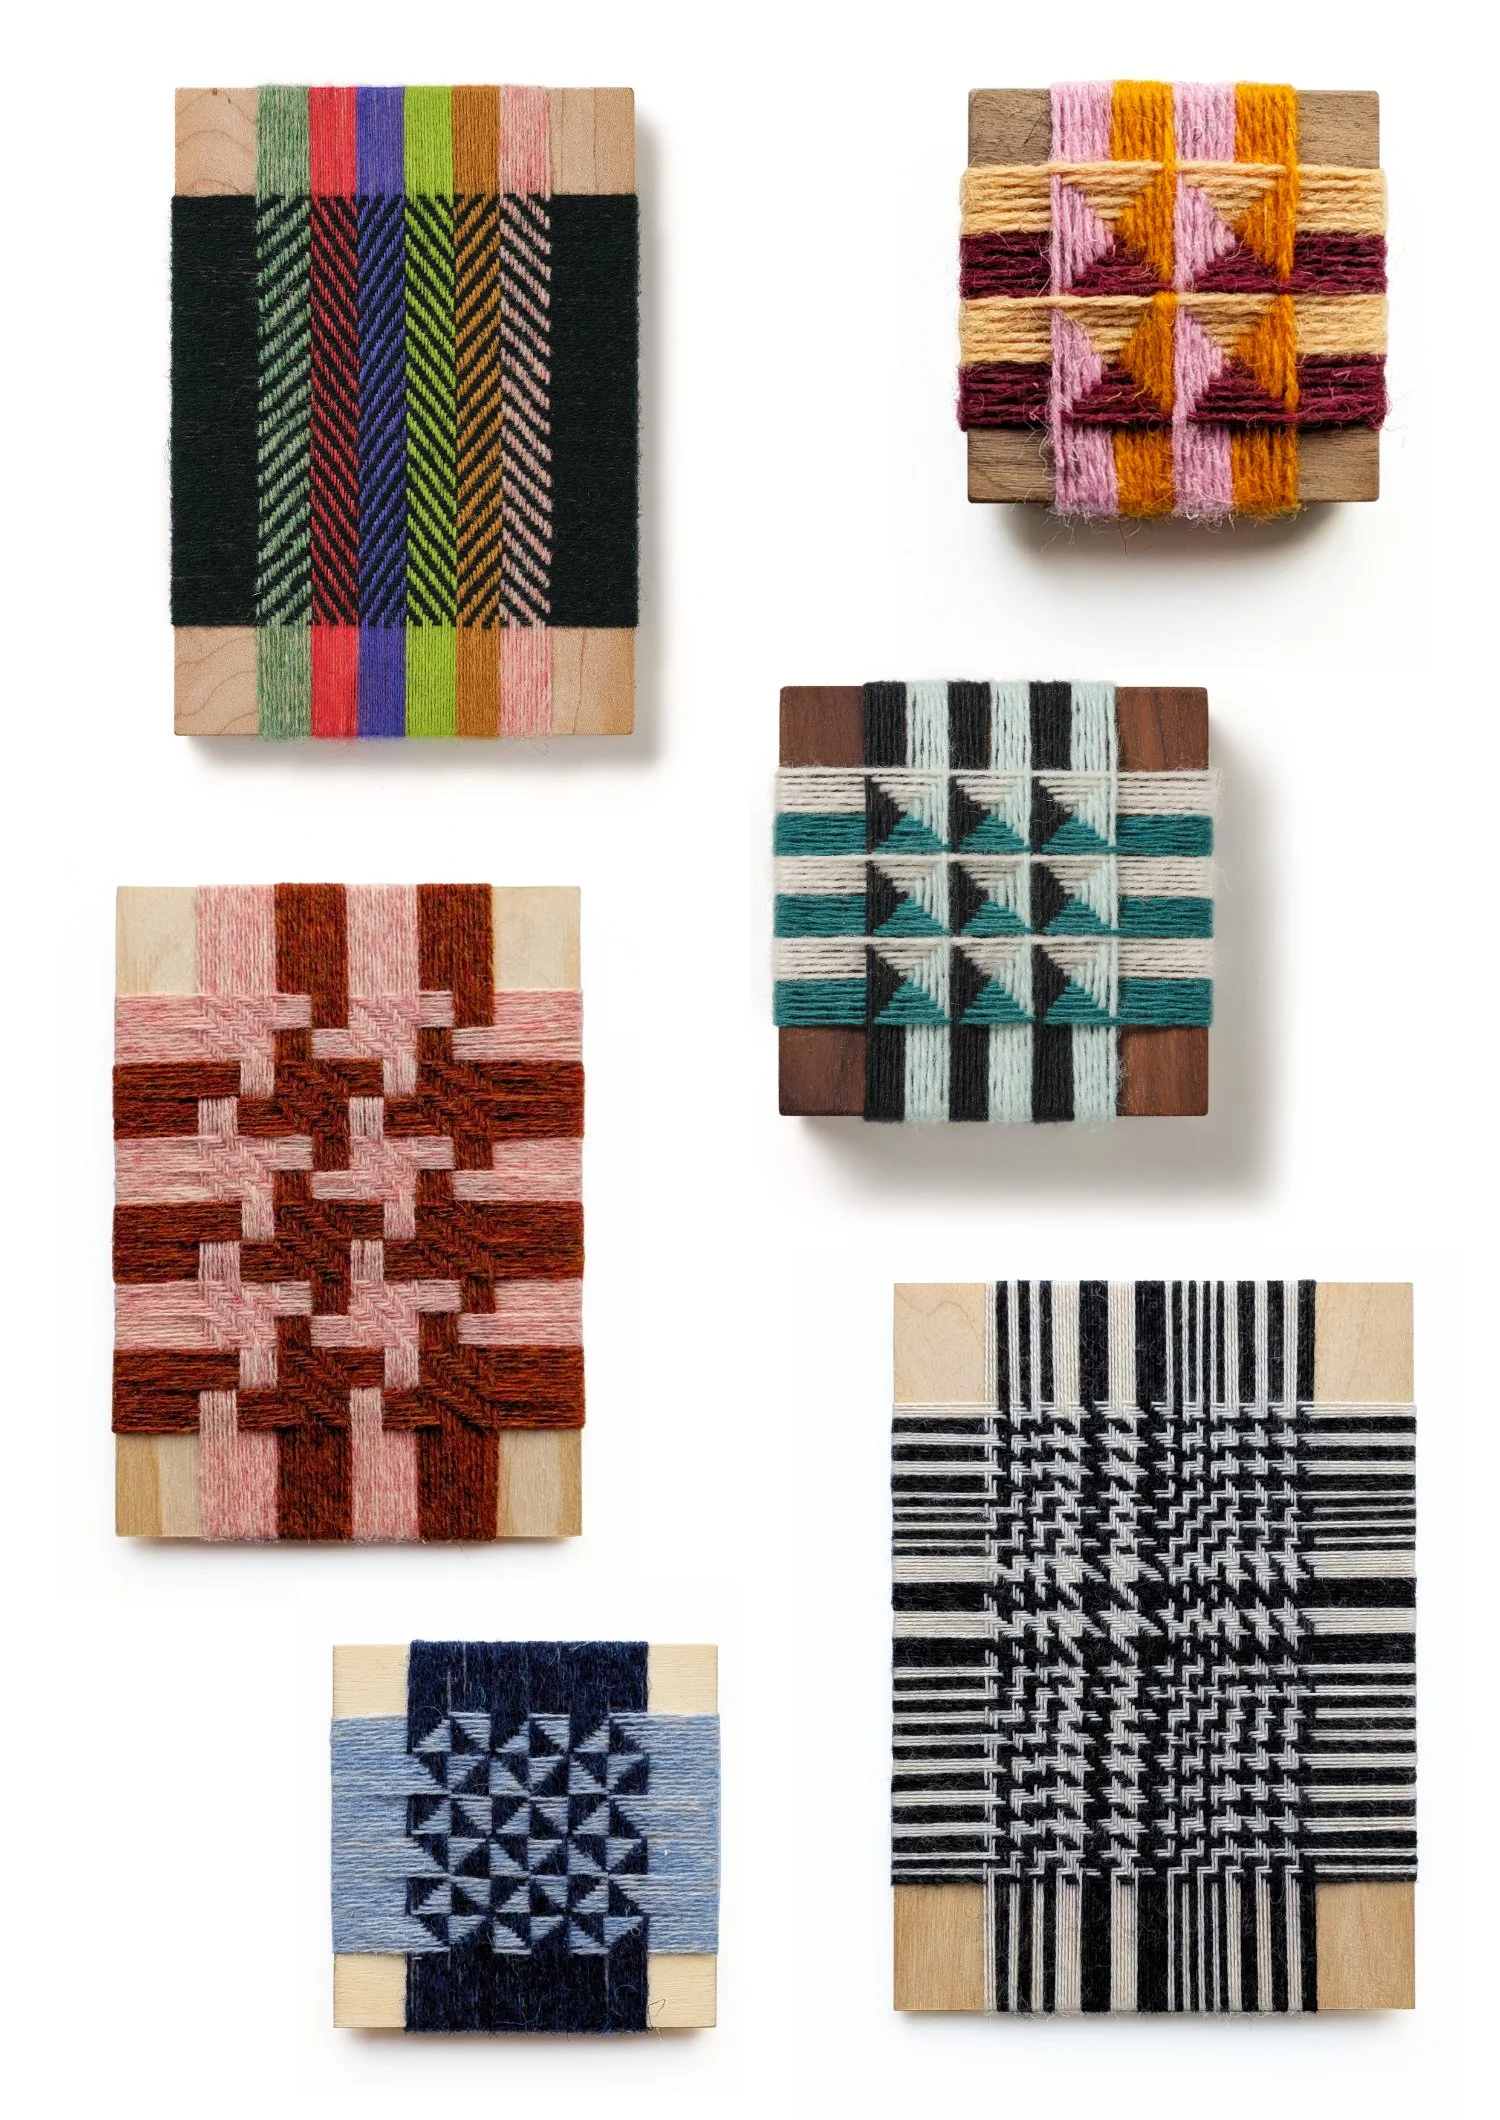
Included in this package are five PDF instruction manuals from Class 2 Off-Loom Weaving:
Waffle (also known as Honeycomb, a beautiful 3D structure)
Oversized Houndstooth (an entirely different pattern to the dogtooth from class 1)
Triangles
Prince of Wales Check
Herringbone
Each manual takes you through the process from start to finish, from winding the warp threads around the base, to weaving each row of weft thread, showing you exactly where to put your needle and when, and how to finish.
These manuals are a follow on from Class 1, so if you are a total beginner I suggest starting with the Class 1 manuals, which you can purchase here, but if you feel you have enough basic weaving skill to catch on, then you can give these a go!
Please Note:
These manuals do not include any videos.
Kits will be available again once I am back from maternity leave ;-)
The manuals are in PDF format and are intended for digital use rather than printing, due to the number of pages.
This learning content is for your personal use only and is not to be shared, re-sold, used for profit or for your own teaching purposes. Thank you ;-)
Happy Weaving!
Materials Kits will be available again soon once I am back from maternity leave - stay tuned! ;-)
Yarn Wrapping Manuals

Please Note: You do not need to buy this manual if you are already booked onto the live Zoom workshop - the manuals come as part of the package!
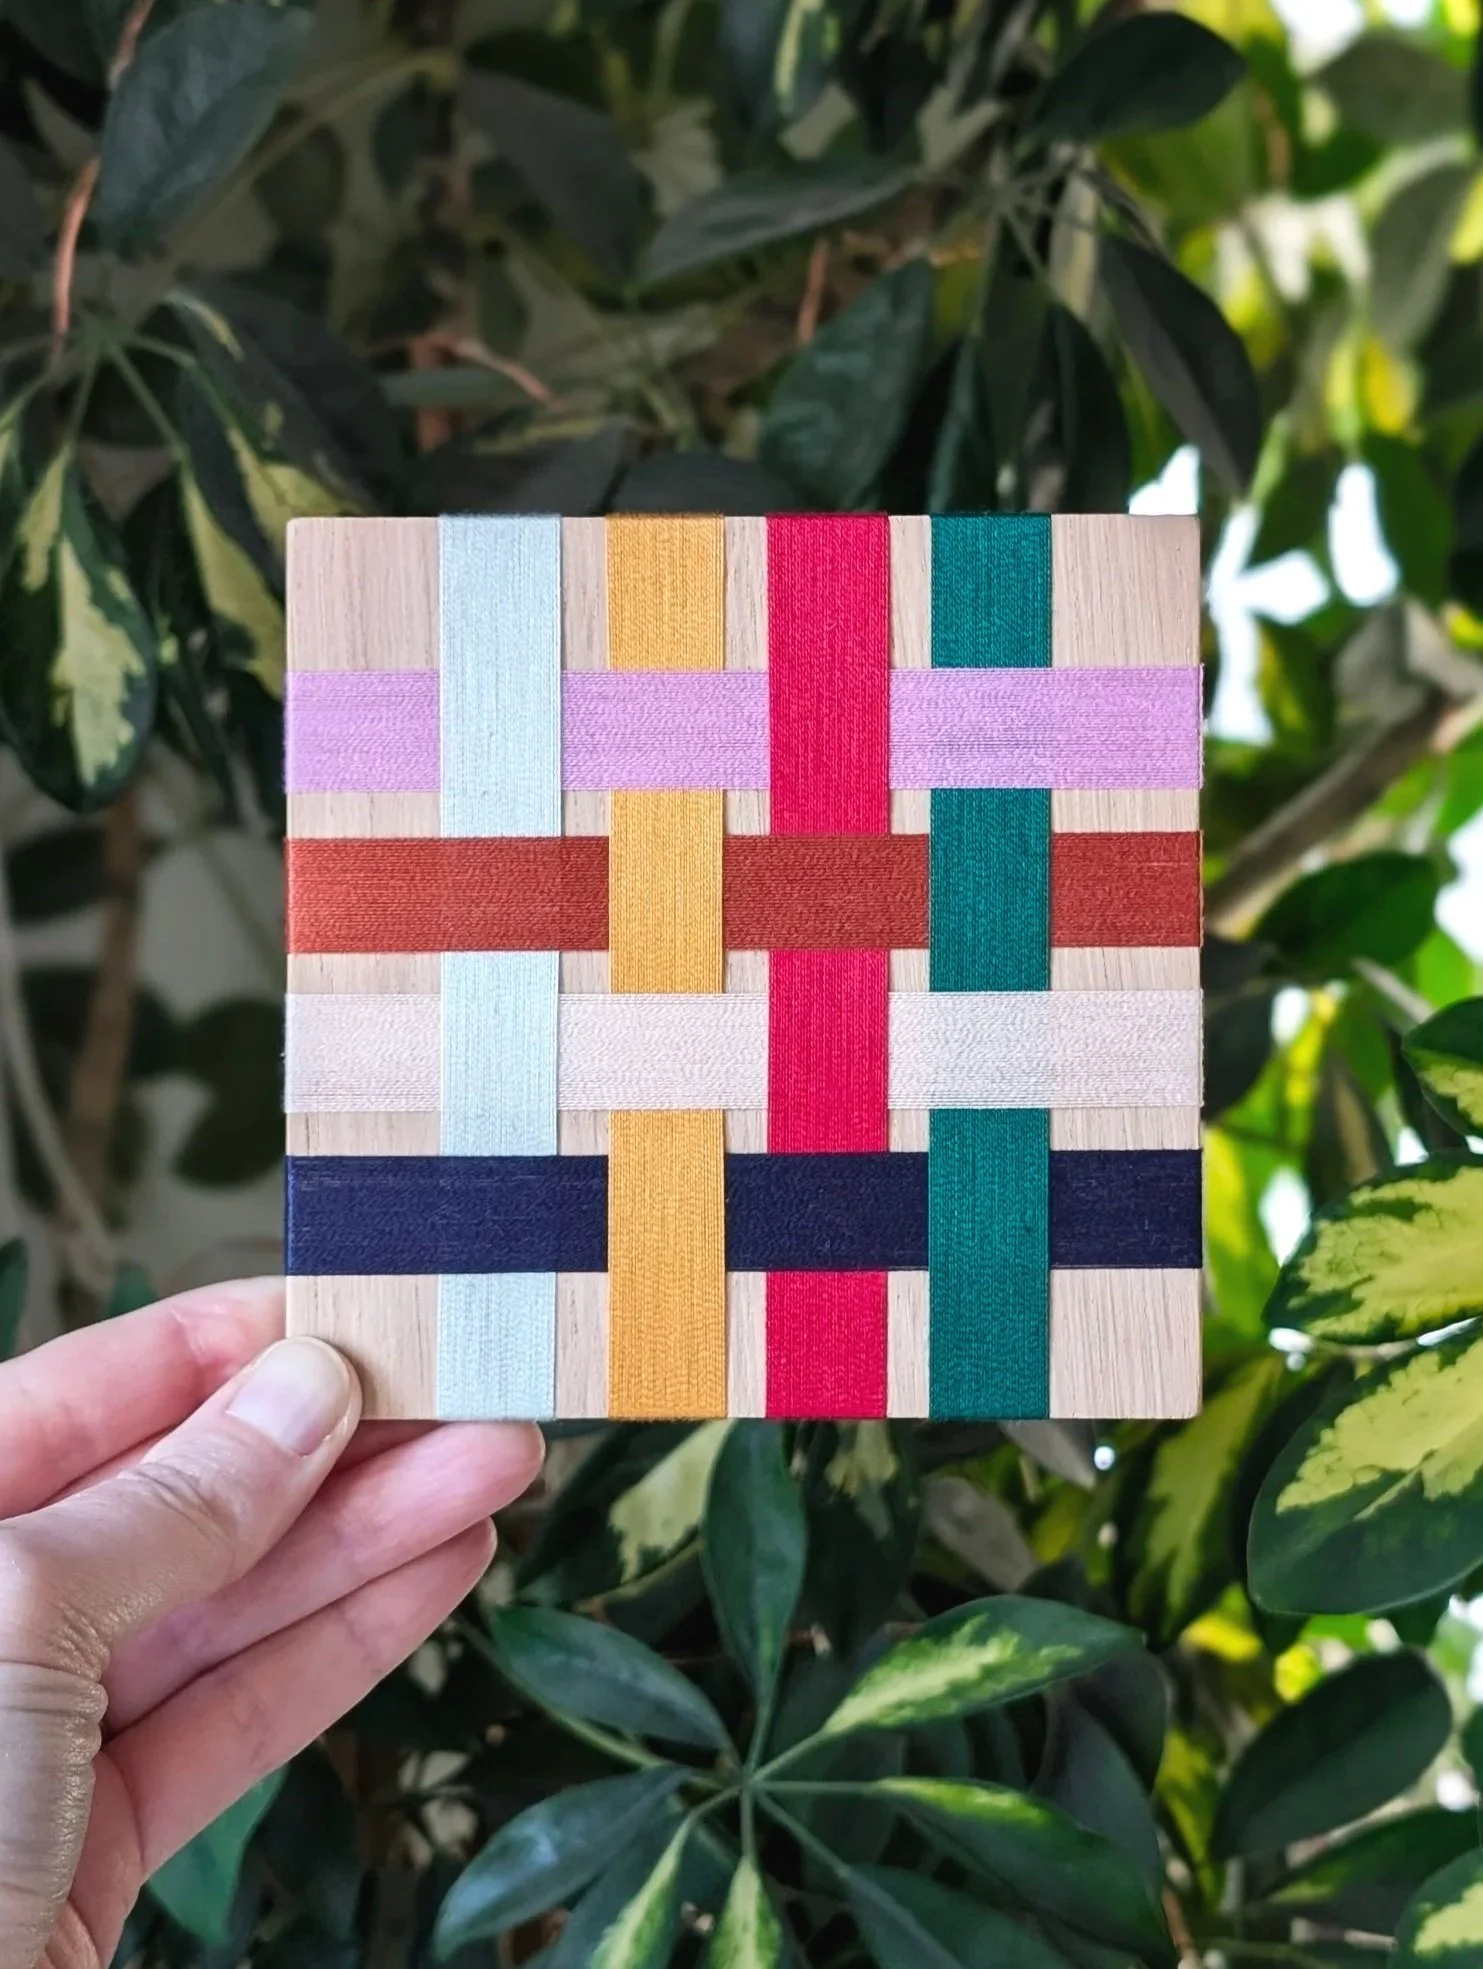
If you’re looking for something simple to start with before trying the more complex woven patterns in Off-Loom Weaving Class 1, these yarn wrappings are for you!
This ‘plait’ design is so simple but versatile.
There are countless ways to use this easy method to create very different designs - the possibilities are endless!
They make great gifts and look lovely framed on the wall too.
This PDF manual is a clear step-by-step photographic guide through the process from start to finish, also showing a few of the different ways you can use it.
Yarn wrappings are also a great way to develop a colour palette - I often use them when I’m designing colours or stripes for fabrics to be woven on my big loom.
You will need:
A base - it doesn’t have to be wood like mine, but does need to be a square. Mine is 4’’ x 4’’ but you can use any size.
Double sided sticky tape
Yarn - I am demonstrating here with regular cotton embroidery floss approximately 6 ply but you can use anything, and you can mix fibres and thicknesses too! Wool, cotton, linen, something novelty, anything goes.
Pencil
Ruler
Scissors
Needle
I hope you enjoy making these!
If you would like to book onto the live virtual Yarn Wrapping Workshop, click here to find see the next available dates. During the live workshop we practice 3 different designs beside this one, including ‘Waffle’, ‘Tree’ and ‘Make It Up As You Go!’.
Please Note: This learning content is for your personal use only and is not to be shared, re-sold or used for profit or for your own teaching purposes. Thank you ;-)

Please Note: You do not need to buy this manual if you are already booked onto the live Zoom workshop - the manuals come as part of the package!
This tree yarn wrapping design makes a perfect festive gift or decoration and is so easy!
You don’t need any experience at all to make this, and once you’ve mastered the technique you’ll discover that you can make lots of other shapes too, not just a tree!
This PDF instruction manual is a clear step-by-step photographic guide through the process from start to finish.
You will need:
A base - it doesn’t have to be wood like mine, but does need to be either rectangular or square so that it can support threads being wrapped both ways.
Double sided sticky tape
Yarn - I am demonstrating here with regular cotton embroidery floss approximately 6 ply but you can use anything, and you can mix fibres and thicknesses too! Wool, cotton, linen, something novelty, anything goes.
Pen
Ruler
A4 white card to make a stencil
Scissors
Needle - I use a flat Bodkin needle but a regular sharp one is fine too.
I hope you enjoy making these!
If you would like to book onto the live virtual Yarn Wrapping Workshop, click here to find see the next available dates. During the live workshop we practice 3 different designs beside this one, including ‘Waffle’, ‘Plait’ and ‘Make it Up As You Go’!
Please Note: This learning content is for your personal use only and is not to be shared, re-sold or used for profit or for your own teaching purposes. Thank you ;-)
Please Note: You do not need to buy this manual if you are already booked onto the live Zoom workshop - the manuals come as part of the package!
If you’re looking for something simple to start with before trying the more complex woven patterns in Off-Loom Weaving Class 1, this one is for you!
No prior weaving or wrapping experience is needed.
These make great gifts and look lovely framed on the wall too.
This PDF instruction manual is a clear step-by-step photographic guide through the process from start to finish.
You will need:
A solid base - it doesn’t have to be wood like mine, but does need to be either rectangular or square so that it can support threads being wrapped both ways.
Double sided sticky tape
Yarn - I am demonstrating here with thin, shiny cotton sewing threads but you can use anything, and you can mix fibres and thicknesses too! Wool, cotton, linen, something novelty, anything goes.
Pencil
Ruler
Scissors
Needle - either a flat Bodkin needle or a regular sharp one is fine too.
I hope you enjoy making these!
If you would like to book onto the live virtual Yarn Wrapping Workshop, click here to find see the next available dates. During the live workshop we practice 3 different designs beside this one, including ‘Waffle’, ‘Plait’ and ‘Tree’!
Please Note: This learning content is for your personal use only and is not to be shared, re-sold or used for profit or for your own teaching purposes. Thank you ;-)
Please Note: You do not need to buy this manual if you are already booked onto the live Zoom workshop - the manuals come as part of the package!
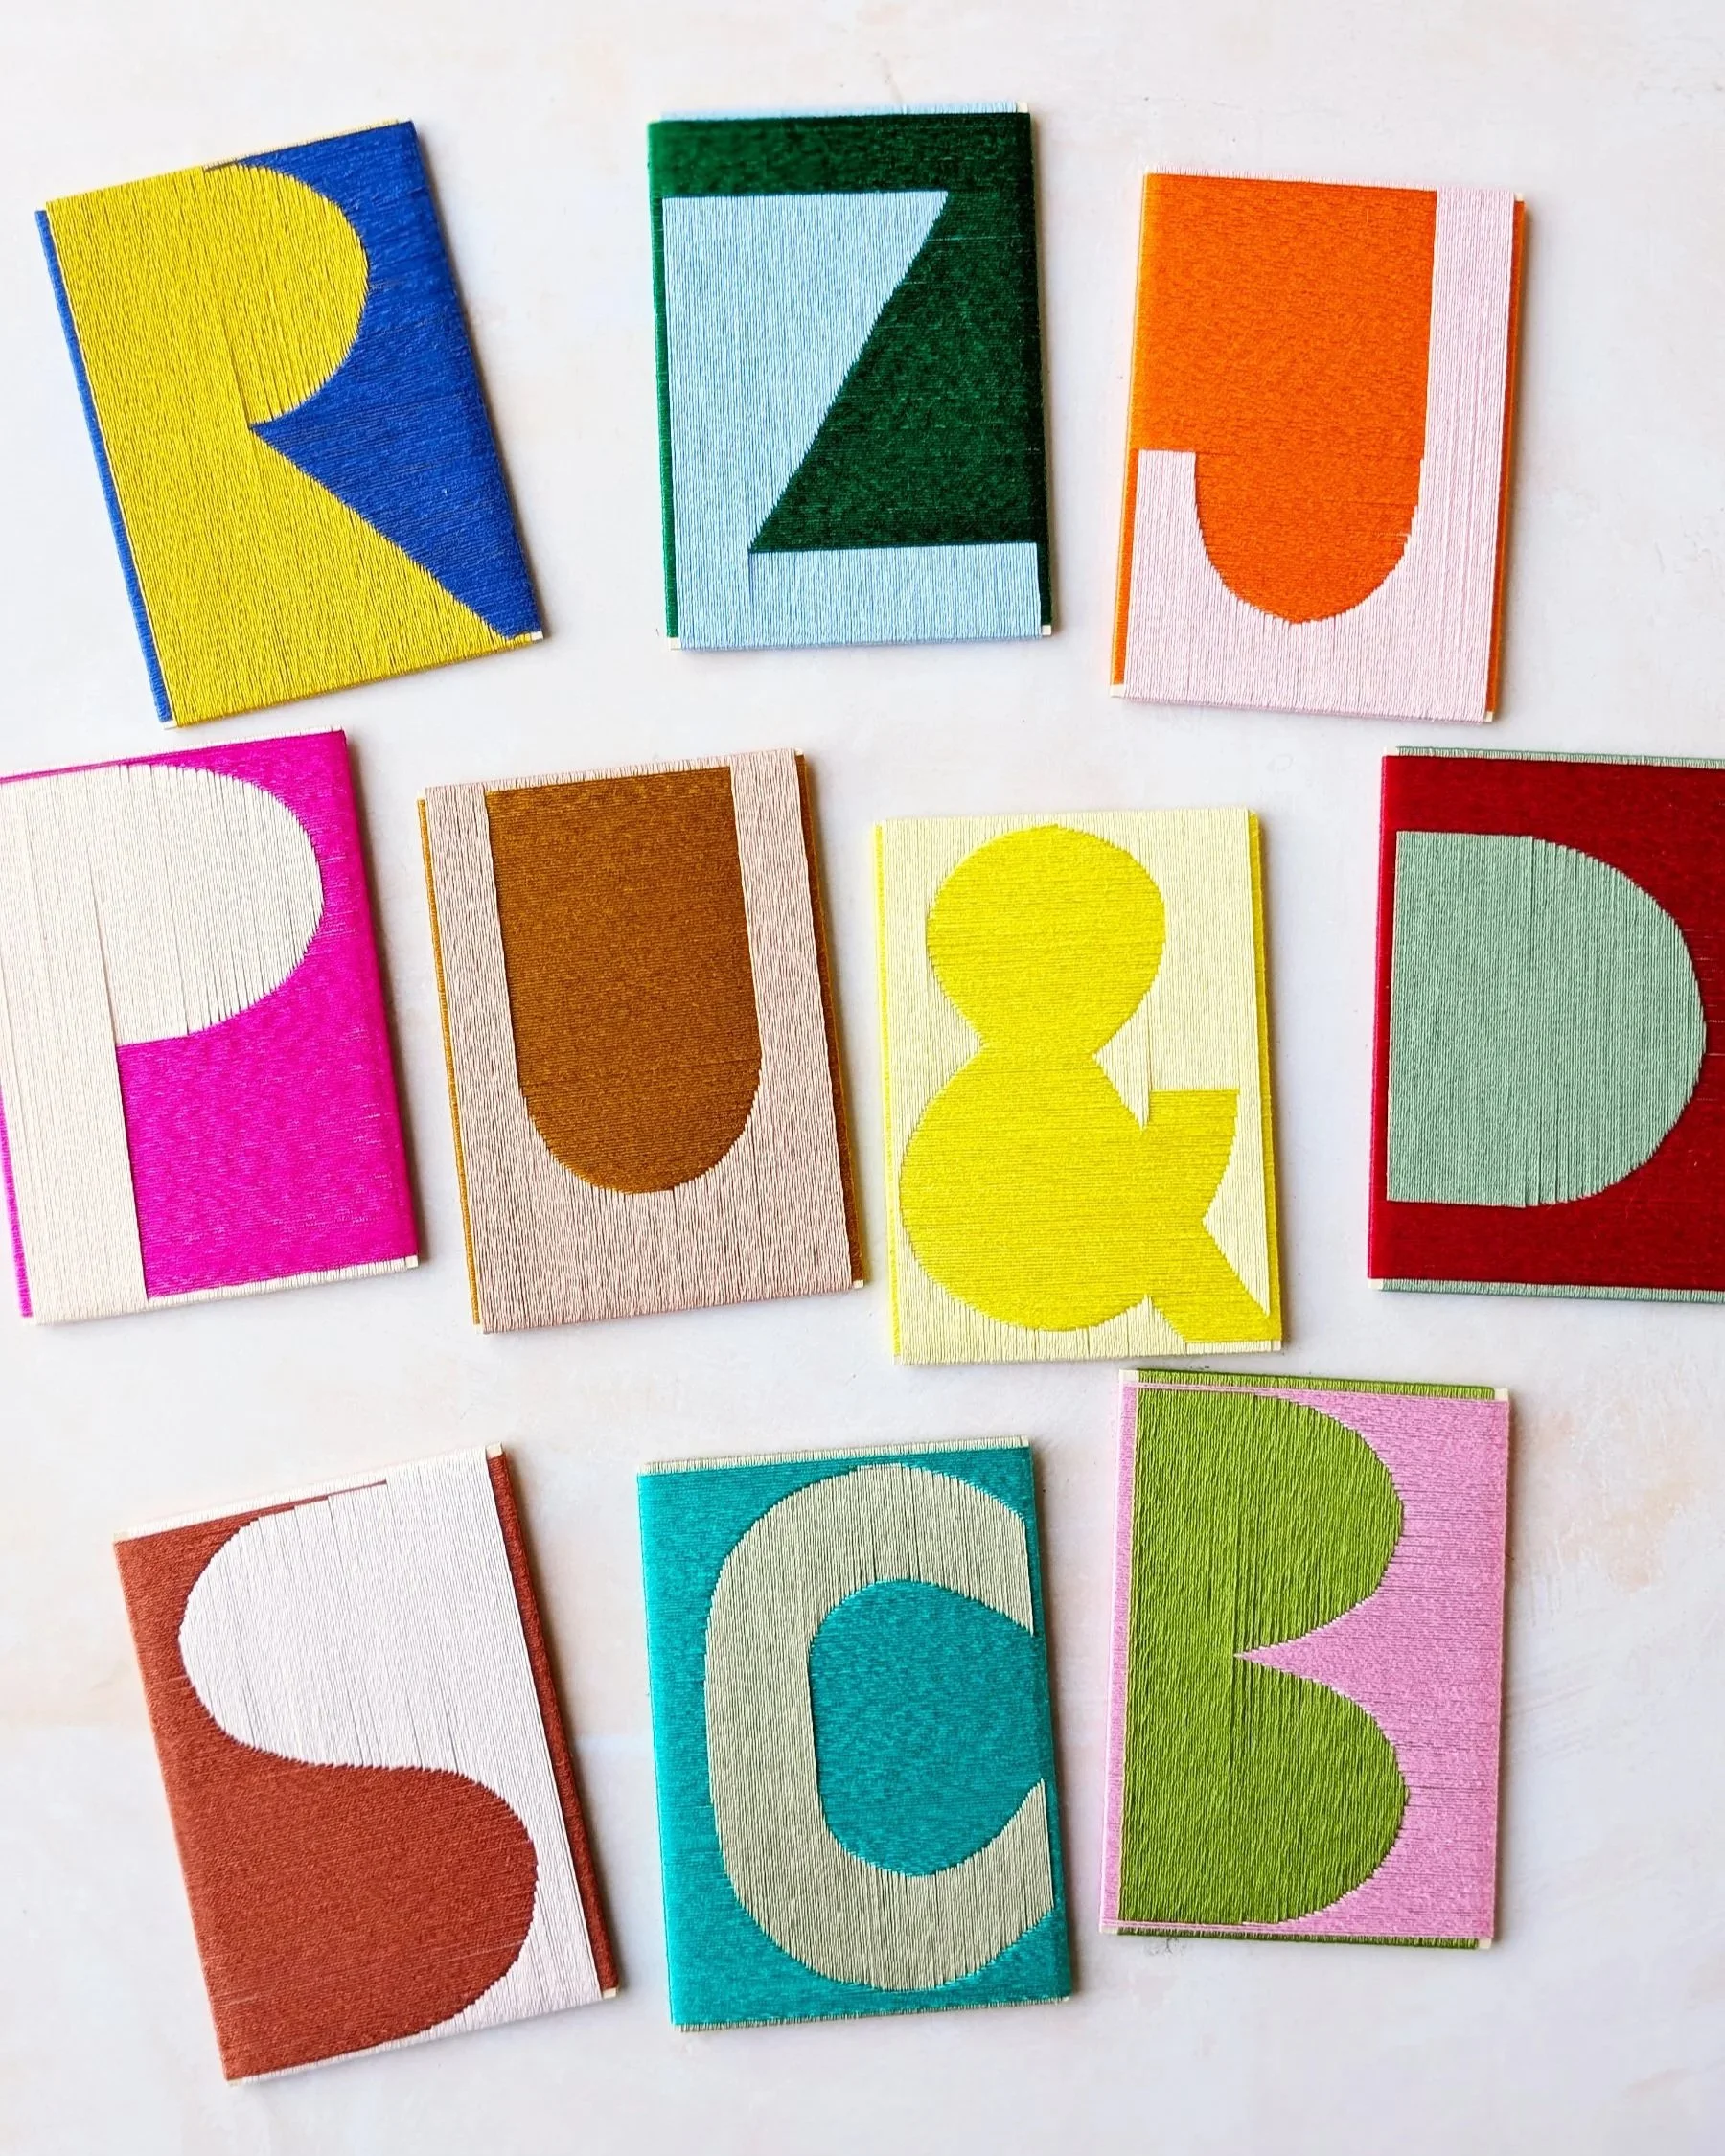
Learn how to create these fabulous wrapped letters using yarn, a needle and thread, and a solid base to wrap around!
These make great bunting, and look lovely framed on the wall too.
This PDF instruction manual is a clear step-by-step photographic guide through the process from start to finish.
Along with the manual you will also find a booklet of printable stencils from A - Z, and some blank template pages for you to design your own.
You will need:
Some bases to wrap around - I’ve used A6 plywood, 3mm thickness
Double sided sticky tape
Yarn - I’ve used 6 ply shiny cotton embroidery floss
Pen & Pencil
Ruler
Scissors
Card to make a stencil
I hope you enjoy making these!
If you would like to book onto the live virtual Yarn Wrapping Workshop, click here to find see the next available dates.
Please Note: This learning content is for your personal use only and is not to be shared, re-sold or used for profit or for your own teaching purposes. Thank you ;-)
Please Note: You do not need to buy this manual if you are already booked onto the live Zoom workshop - the manuals come as part of the package!
This yarn wrapping design is so simple but SO effective!
These make great greetings cards and look lovely framed on the wall too.
This PDF instruction manual is a clear step-by-step photographic guide through the process from start to finish.
You will need:
A base to wrap around - I’ve used 1.5mm mount board (1500 micron card)
Double sided sticky tape
Yarn - I’ve used thin, shiny sewing cottons
Pencil
Ruler
Scissors
I hope you enjoy making these!
If you would like to book onto the live virtual Yarn Wrapping Workshop, click here to find see the next available dates.
Please Note: This learning content is for your personal use only and is not to be shared, re-sold or used for profit or for your own teaching purposes. Thank you ;-)
Please Note: You do not need to buy this manual if you are already booked onto the live Zoom workshop - the manuals come as part of the package!
If you’re looking for something simple to start with before trying the more complex woven patterns in Off-Loom Weaving Class 1, this is for you!
This yarn wrapping design is so simple but SO effective!
You don’t need any experience at all to make this, and we’re not following any specific patterns here - it’s very much a ‘make it up as you go’ sort of feeling!
They make great gifts and look lovely framed on the wall too.
This PDF instruction manual is a clear step-by-step photographic guide through the process from start to finish.
You will need:
A base - it doesn’t have to be wood like mine, but does need to be either rectangular or square so that it can support threads being wrapped both ways.
Double sided sticky tape
Yarn - I am demonstrating here with regular cotton embroidery floss approximately 6 ply but you can use anything, and you can mix fibres and thicknesses too! Wool, cotton, linen, something novelty, anything goes.
Pencil
Ruler
Scissors
Needle - I use a flat Bodkin needle but a regular sharp one is fine too.
I hope you enjoy making these!
If you would like to book onto the live virtual Yarn Wrapping Workshop, click here to find see the next available dates. During the live workshop we practice 3 different designs beside this one, including ‘Waffle’, ‘Plait’ and ‘Tree’!
Please Note: This learning content is for your personal use only and is not to be shared, re-sold or used for profit or for your own teaching purposes. Thank you ;-)

Please Note: You do not need to buy this manual if you are already booked onto the live Zoom workshop - the manuals come as part of the package!
If you’re looking for something simple to start with before trying the more complex woven patterns in Off-Loom Weaving Class 1, this is for you!
This yarn wrapping design is very versatile - there are so many ways to use it and with such different results.
You don’t need any experience at all to make this, it is suitable for all levels from total beginner onwards.
They make great gifts and look lovely framed on the wall too.
This PDF instruction manual is a clear step-by-step photographic guide through the process from start to finish.
You will need:
A base - it doesn’t have to be wood like mine, but does need to be a square. Mine is 4’’ x 4’’ but you can use any size.
Double sided sticky tape
Yarn - I am demonstrating here with regular cotton embroidery floss approximately 6 ply but you can use anything, and you can mix fibres and thicknesses too! Wool, cotton, linen, something novelty, anything goes.
Pencil
Ruler
Scissors
Needle - I use a flat Bodkin needle but a regular sharp one is fine too.
I hope you enjoy making these!
If you would like to book onto the live virtual Yarn Wrapping Workshop, click here to find see the next available dates. During the live workshop we practice 3 different designs beside this one, including ‘Plait’, ‘Make It Up As You Go’ and ‘Tree’!
Please Note: This learning content is for your personal use only and is not to be shared, re-sold or used for profit or for your own teaching purposes. Thank you ;-)
Paper Weaving Manuals

Learn how to make this fabulous, colourful weave using paper! Great for greetings cards and for framed artworks for the wall.
Paper weaving is a fun and simple way of getting to grips with the basics of woven structure, especially if you’re thinking of learning how to weave on a loom.
Weaving can be beneficial for both kids and adults - it is a great way to practice problem solving, develop hand eye coordination, and exercise our fine motor skills.
This instruction manual is a clear and thorough photographic guide, taking you through each stage, step by step, row by row from start to finish.
You will need:
cutting board
craft knife
metal ruler
a variety of coloured paper or card
double sided adhesive tape
cellotape
scissors
Please note - all instruction manuals are included in the price of the workshop, so please do not purchase instruction manuals if you are booked onto a live workshop.
Please also note - These manuals are for your personal use only and are not to be shared or re-sold. Thank you ;-)

Learn how to make this optical woven pattern, using strips of coloured paper! Great for greetings cards and for framed artworks for the wall.
Paper weaving is a fun and simple way to get to grips with the basics of woven structure, if you’re thinking of learning to weave on a loom.
Weaving can be beneficial for both kids and adults - it is a great way to practice problem solving, develop hand eye coordination, and exercise our fine motor skills.
This design is woven using the 4/4 twill structure, which is essentially ‘over four, under four, over four, under four’ and so on. This, combined with some simple stripes will create this ‘staircase’ pattern, as if by magic!
The instruction manual is a clear and thorough photographic guide, taking you through each stage, step by step, row by row from start to finish.
You will need:
cutting board
craft knife
metal ruler
a variety of coloured paper or card
double sided adhesive tape
cellotape
scissors
If you didn’t make it to the last online workshop on paper weaving & card making, and would like to participate in the next one, you can book here
Please note - all instruction manuals are included in the price of the workshop, so please do not purchase instruction manuals if you are booked onto a live workshop.
Please also note - These manuals are for your personal use only and are not to be shared or re-sold. Thank you :-)

Learn how to make this fabulous, colourful woven dogtooth pattern using paper! Great for greetings cards and for framed artworks for the wall.
Paper weaving is also a fun and simple way to get to grips with the basics of woven structure, if you’re thinking of learning to weave on a loom.
Weaving can be beneficial for both kids and adults - it is a great way to practice problem solving, develop hand eye coordination, and exercise our fine motor skills.
This design is woven using the 2/2 twill structure, which is essentially ‘over two, under two, over two, under two’ and so on. Combined with stripes in both warp and weft, the dogtooth pattern just…magically appears!
The instruction manual is a clear and thorough photographic guide, taking you through each stage, step by step, row by row from start to finish.
You will need:
cutting board
craft knife
metal ruler
two contrasting colours in paper or card (though you can experiment with adding extra colours to create variations on the pattern!)
double sided adhesive tape
cellotape
scissors
If you didn’t make it to the last online workshop on paper weaving & card making, and would like to participate in the next one, you can book here
Please note - all instruction manuals are included in the price of the workshop, so please do not purchase instruction manuals if you are booked onto a live workshop.
Please also note - These manuals are for your personal use only and are not to be shared or re-sold. Thank you :-)

Learn how to weave a simple 2/2 twill pattern using paper! Great for greetings cards and for framed artworks for the wall.
Paper weaving is a fun and simple way to get to grips with the basics of woven structure, if you’re thinking of learning to weave on a loom.
Weaving can be beneficial for both kids and adults - it is a great way to practice problem solving, develop hand eye coordination, and exercise our fine motor skills.
Twill is one of the simplest and most versatile woven structures. Each row is ‘over two, under two, over two, under two’ and so on. Once you’ve mastered this structure, you can use it to create many other patterns, just by adding stripes of colour.
This instruction manual is a clear and thorough photographic guide, taking you through each stage, step by step, row by row from start to finish.
You will need:
cutting board
craft knife
metal ruler
a variety of coloured paper or card
double sided adhesive tape
cellotape
scissors
If you didn’t make it to the last online workshop on paper weaving & card making, and would like to participate in the next one, you can book here
Please note - all instruction manuals are included in the price of the workshop, so please do not purchase instruction manuals if you are booked onto a live workshop.
Please also note - These manuals are for your personal use only and are not to be shared or re-sold. Thank you :-)
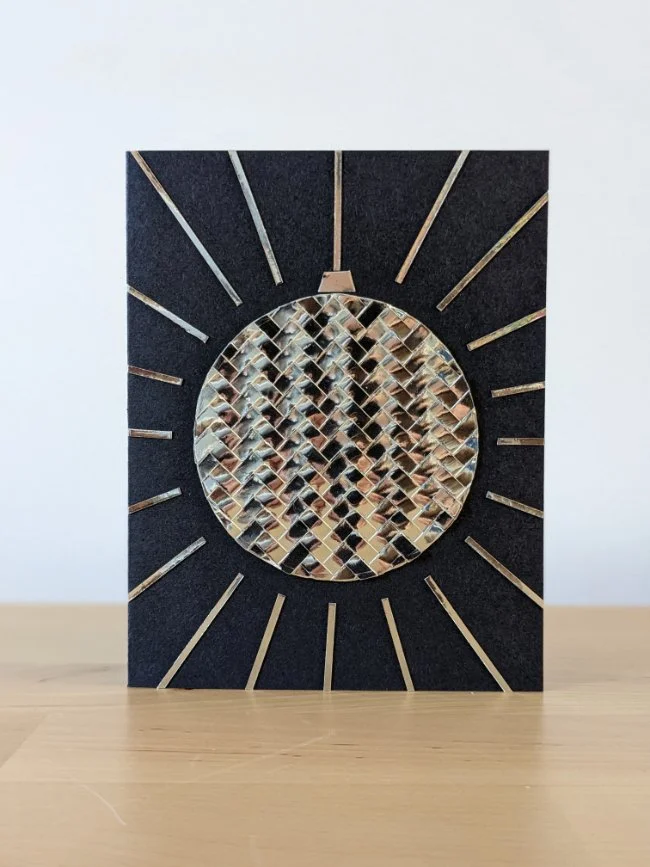
A clear and informative instruction manual on how to make this gorgeous woven bauble card!
Paper weaving is also a great way to get to grips with the basics of woven structure, if you’re thinking of learning to weave on a loom.
For this design you will need:
Silver card for the bauble (or colour of your choice)
Black card for the base (or colour of your choice)
Scissors
Craft Knife
Cutting Board
Metal Ruler
Cellotape
Double sided adhesive tape
Pen or pencil
Please note - These manuals are for your personal use only and are not to be shared or re-sold. Thank you ;-)

Learn how to make this fabulous, colourful woven dogtooth pattern using paper! Great for greetings cards and for framed artworks for the wall.
Paper weaving is a fun and simple way to get to grips with the basics of woven structure, if you’re thinking of learning to weave on a loom.
Weaving can be beneficial for both kids and adults - it is a great way to practice problem solving, develop hand eye coordination, and exercise our fine motor skills.
This design is woven using the 3/3 twill structure, which is essentially ‘over three, under three, over three, under three’ and so on. With the addition of strips in both the warp and the weft, the dogtooth pattern will just….magically appear!
The instruction manual is a clear and thorough photographic guide, taking you through each stage, step by step, row by row from start to finish.
You will need:
cutting board
craft knife
metal ruler
two contrasting colours in paper or card (though you can experiment with adding extra colours to create variations on the pattern)
double sided adhesive tape
cellotape
scissors
If you didn’t make it to the last online workshop on paper weaving & card making, and would like to participate in the next one, you can book here
Please note - all instruction manuals are included in the price of the workshop, so please do not purchase instruction manuals if you are booked onto a live workshop.
Please also note - These manuals are for your personal use only and are not to be shared or re-sold. Thank you :-)

Learn how to make this fabulous woven pattern using paper! Great for greetings cards and for framed artworks for the wall.
Paper weaving is a fun and simple way to get to grips with the basics of woven structure, especially if you’re thinking of learning to weave on a loom.
Weaving can be beneficial for both kids and adults - it is a great way to practice problem solving, develop hand eye coordination, and exercise our fine motor skills.
This design is woven using the 4/4 twill structure, which is essentially ‘over four, under four, over four, under four’ and so on.
The instruction manual is a clear and thorough photographic guide, taking you through each stage, step by step, row by row from start to finish.
You will need:
cutting board
craft knife
metal ruler
two contrasting colours in paper or card (though you can experiment with adding extra colours to discover more patterns!)
double sided adhesive tape
cellotape
scissors
If you didn’t make it to the last online workshop on paper weaving & card making, and would like to participate in the next one, you can book here
Please note - all instruction manuals are included in the price of the workshop, so please do not purchase instruction manuals if you are booked onto a live workshop.
Please also note - These manuals are for your personal use only and are not to be shared or re-sold. Thank you ;-)

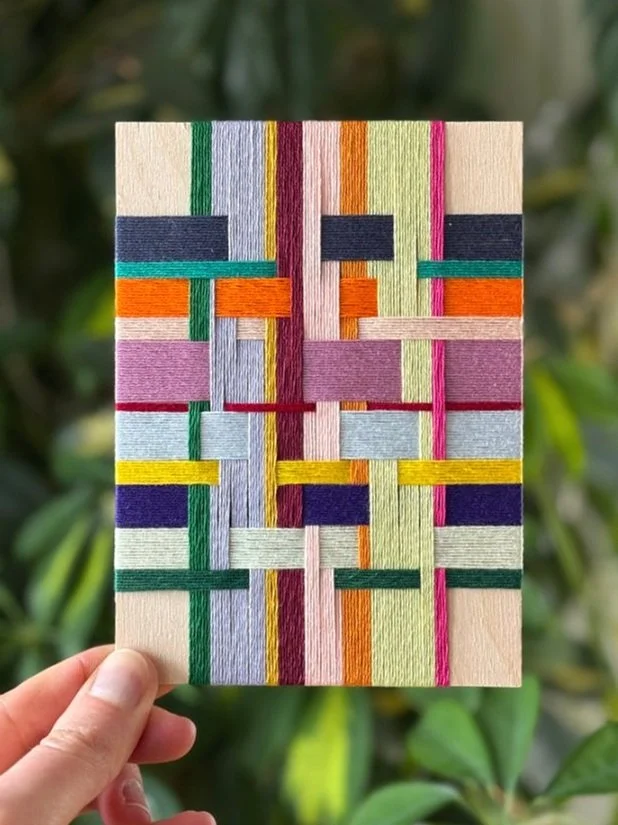
Learn how to make this fabulous, colourful weave using paper! Great for greetings cards and for framed artworks for the wall.
Paper weaving is a fun and simple way to get to grips with the basics of woven structure, especially if you’re thinking of learning to weave on a loom.
Weaving can be beneficial for both kids and adults - it is a great way to practice problem solving, develop hand eye coordination, and exercise our fine motor skills.
This instruction manual is a clear and thorough photographic guide, taking you through each stage, step by step, row by row from start to finish.
You will need:
cutting board
craft knife
metal ruler
a variety of coloured paper or card
double sided adhesive tape
cellotape
scissors
If you didn’t make it to the last online workshop on paper weaving & card making, and would like to participate in the next one, you can book here
Please note - all instruction manuals are included in the price of the workshop, so please do not purchase instruction manuals if you are booked onto a live workshop.
Please also note - These manuals are for your personal use only and are not to be shared or re-sold. Thank you :-)
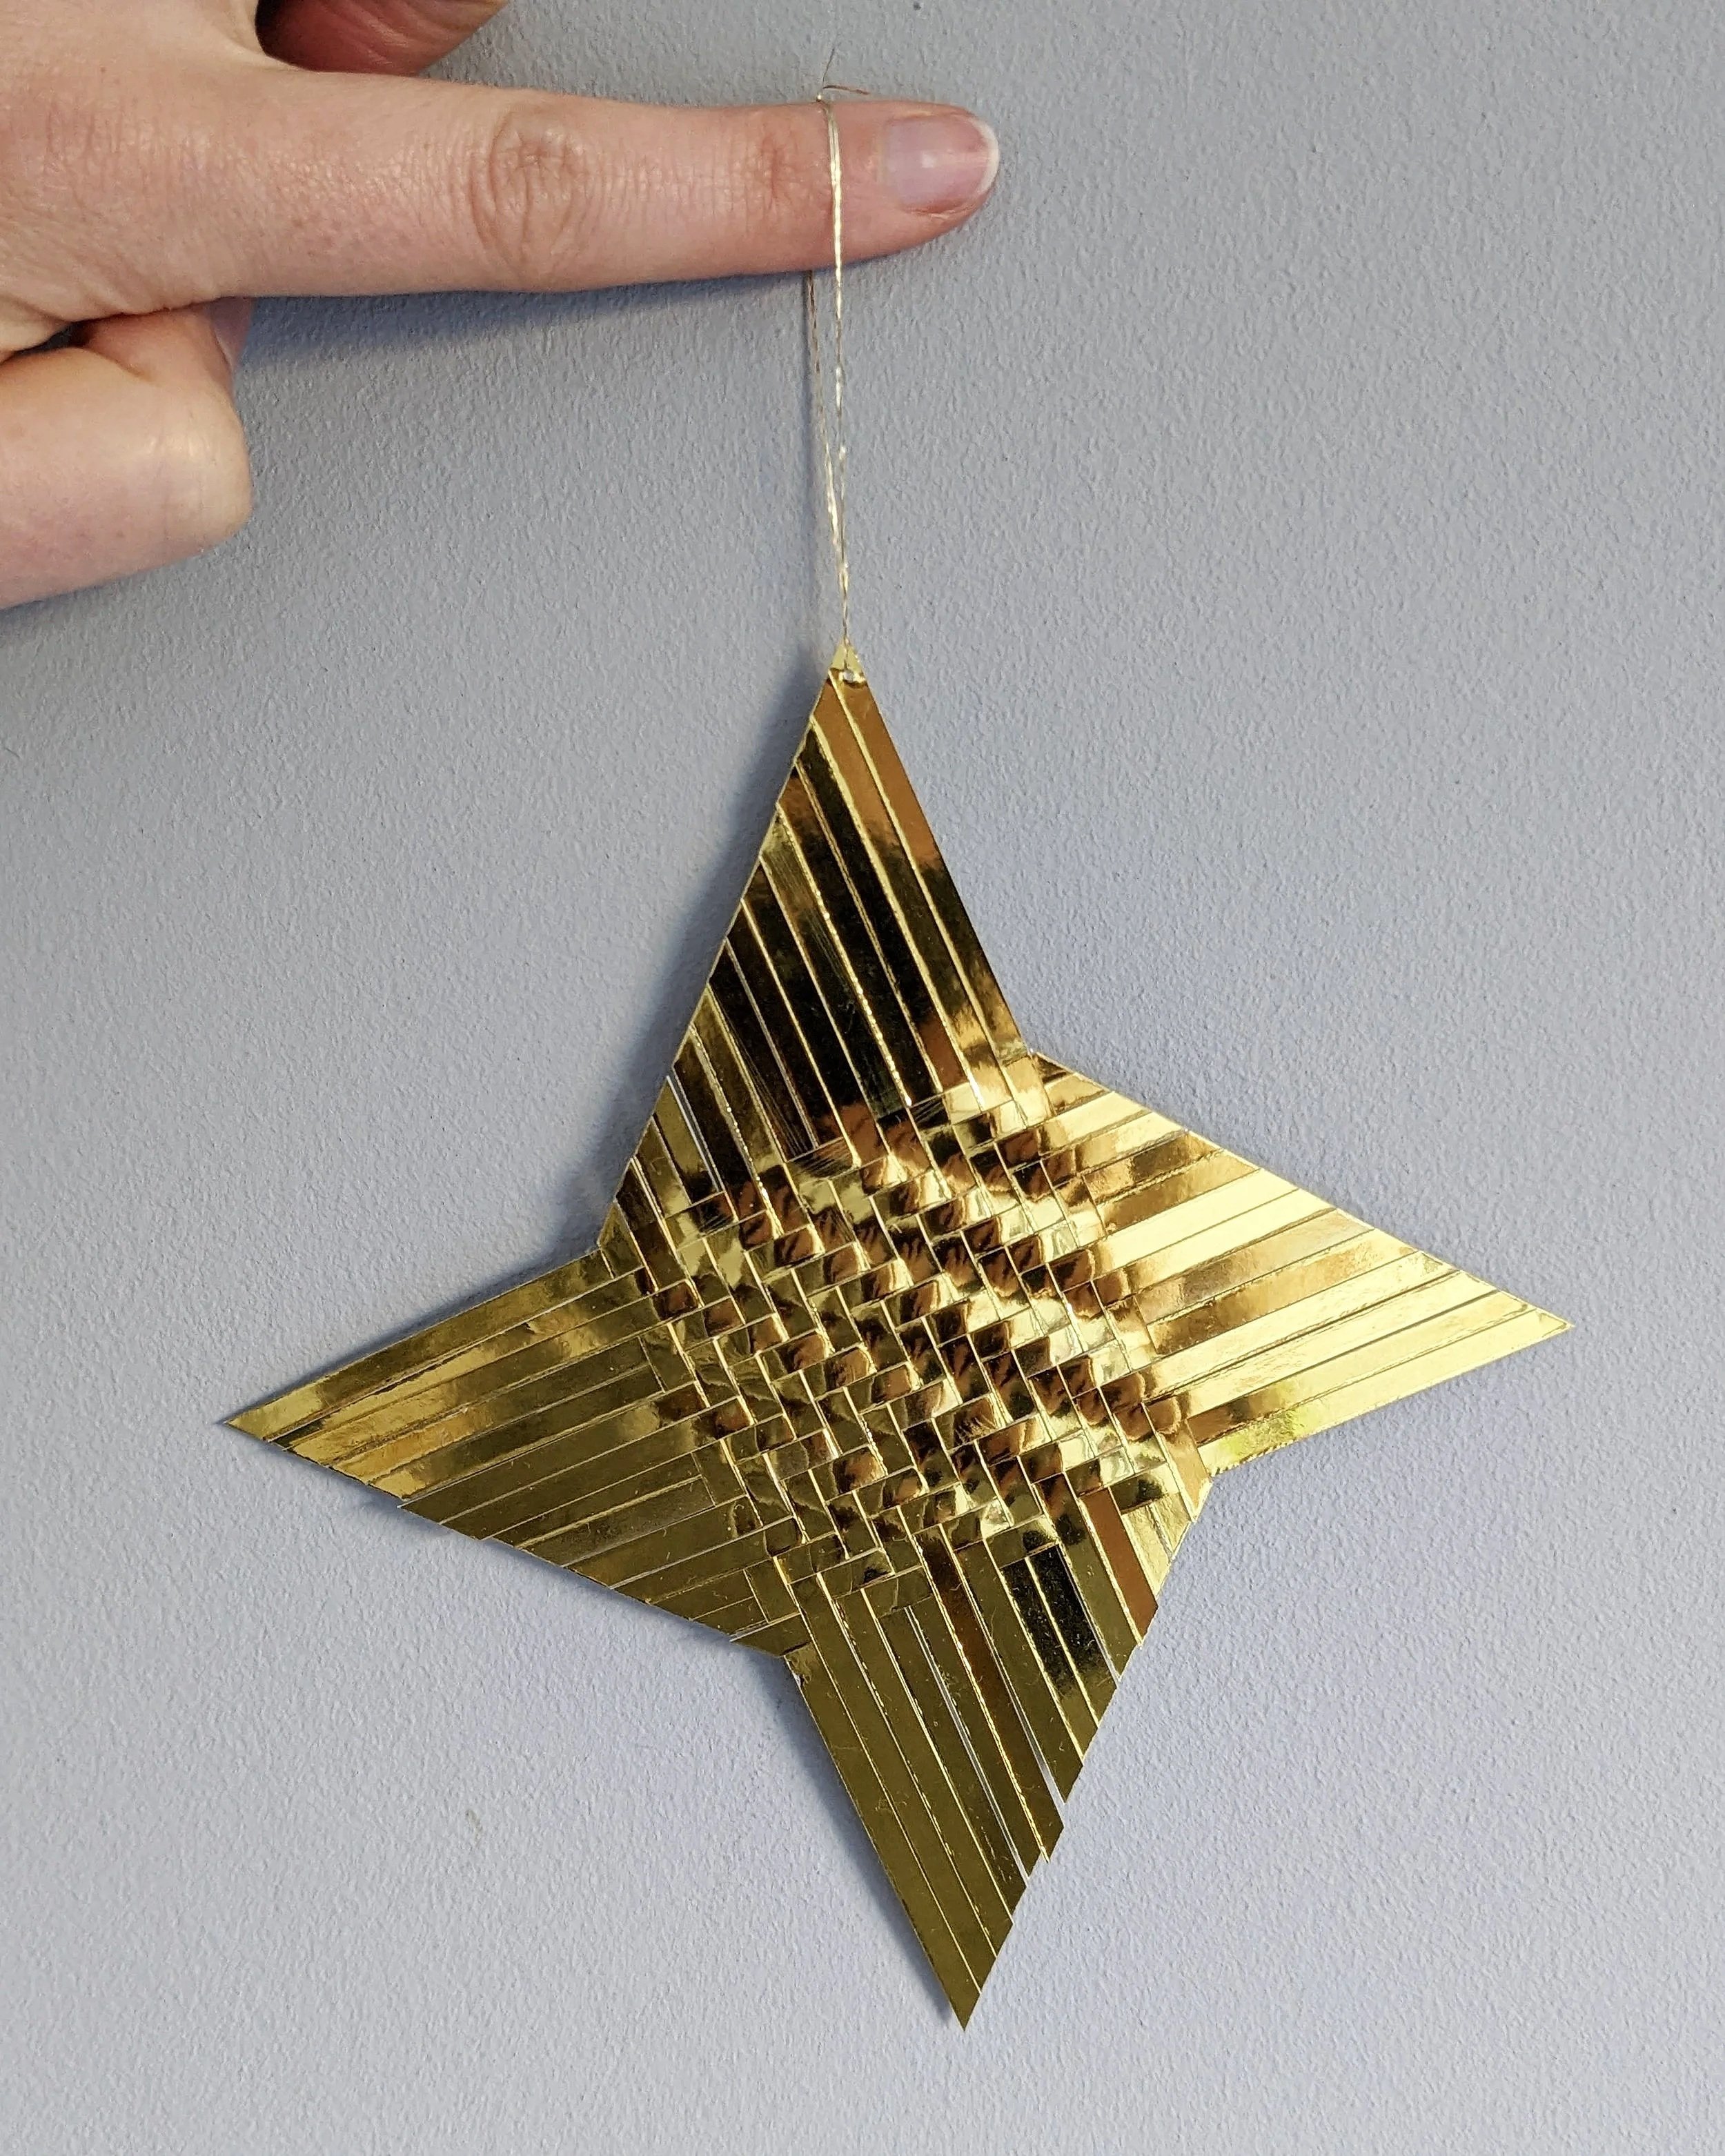
A clear and informative instruction manual on how to make this gorgeous woven star decoration!
Paper weaving is also a great way to get to grips with the basics of woven structure, if you’re thinking of learning to weave on a loom.
This instruction manual is a clear and thorough guide through the design, step by step from start to finish, and is suitable for beginners.
For this design you will need:
Gold card (or colour of your choice)
Cellotape
Scissors
Craft Knife
Cutting Board
Metal Ruler
Sharp needle
Short length of thread
Please note - These manuals are for your personal use only and are not to be shared or re-sold. Thank you ;-)

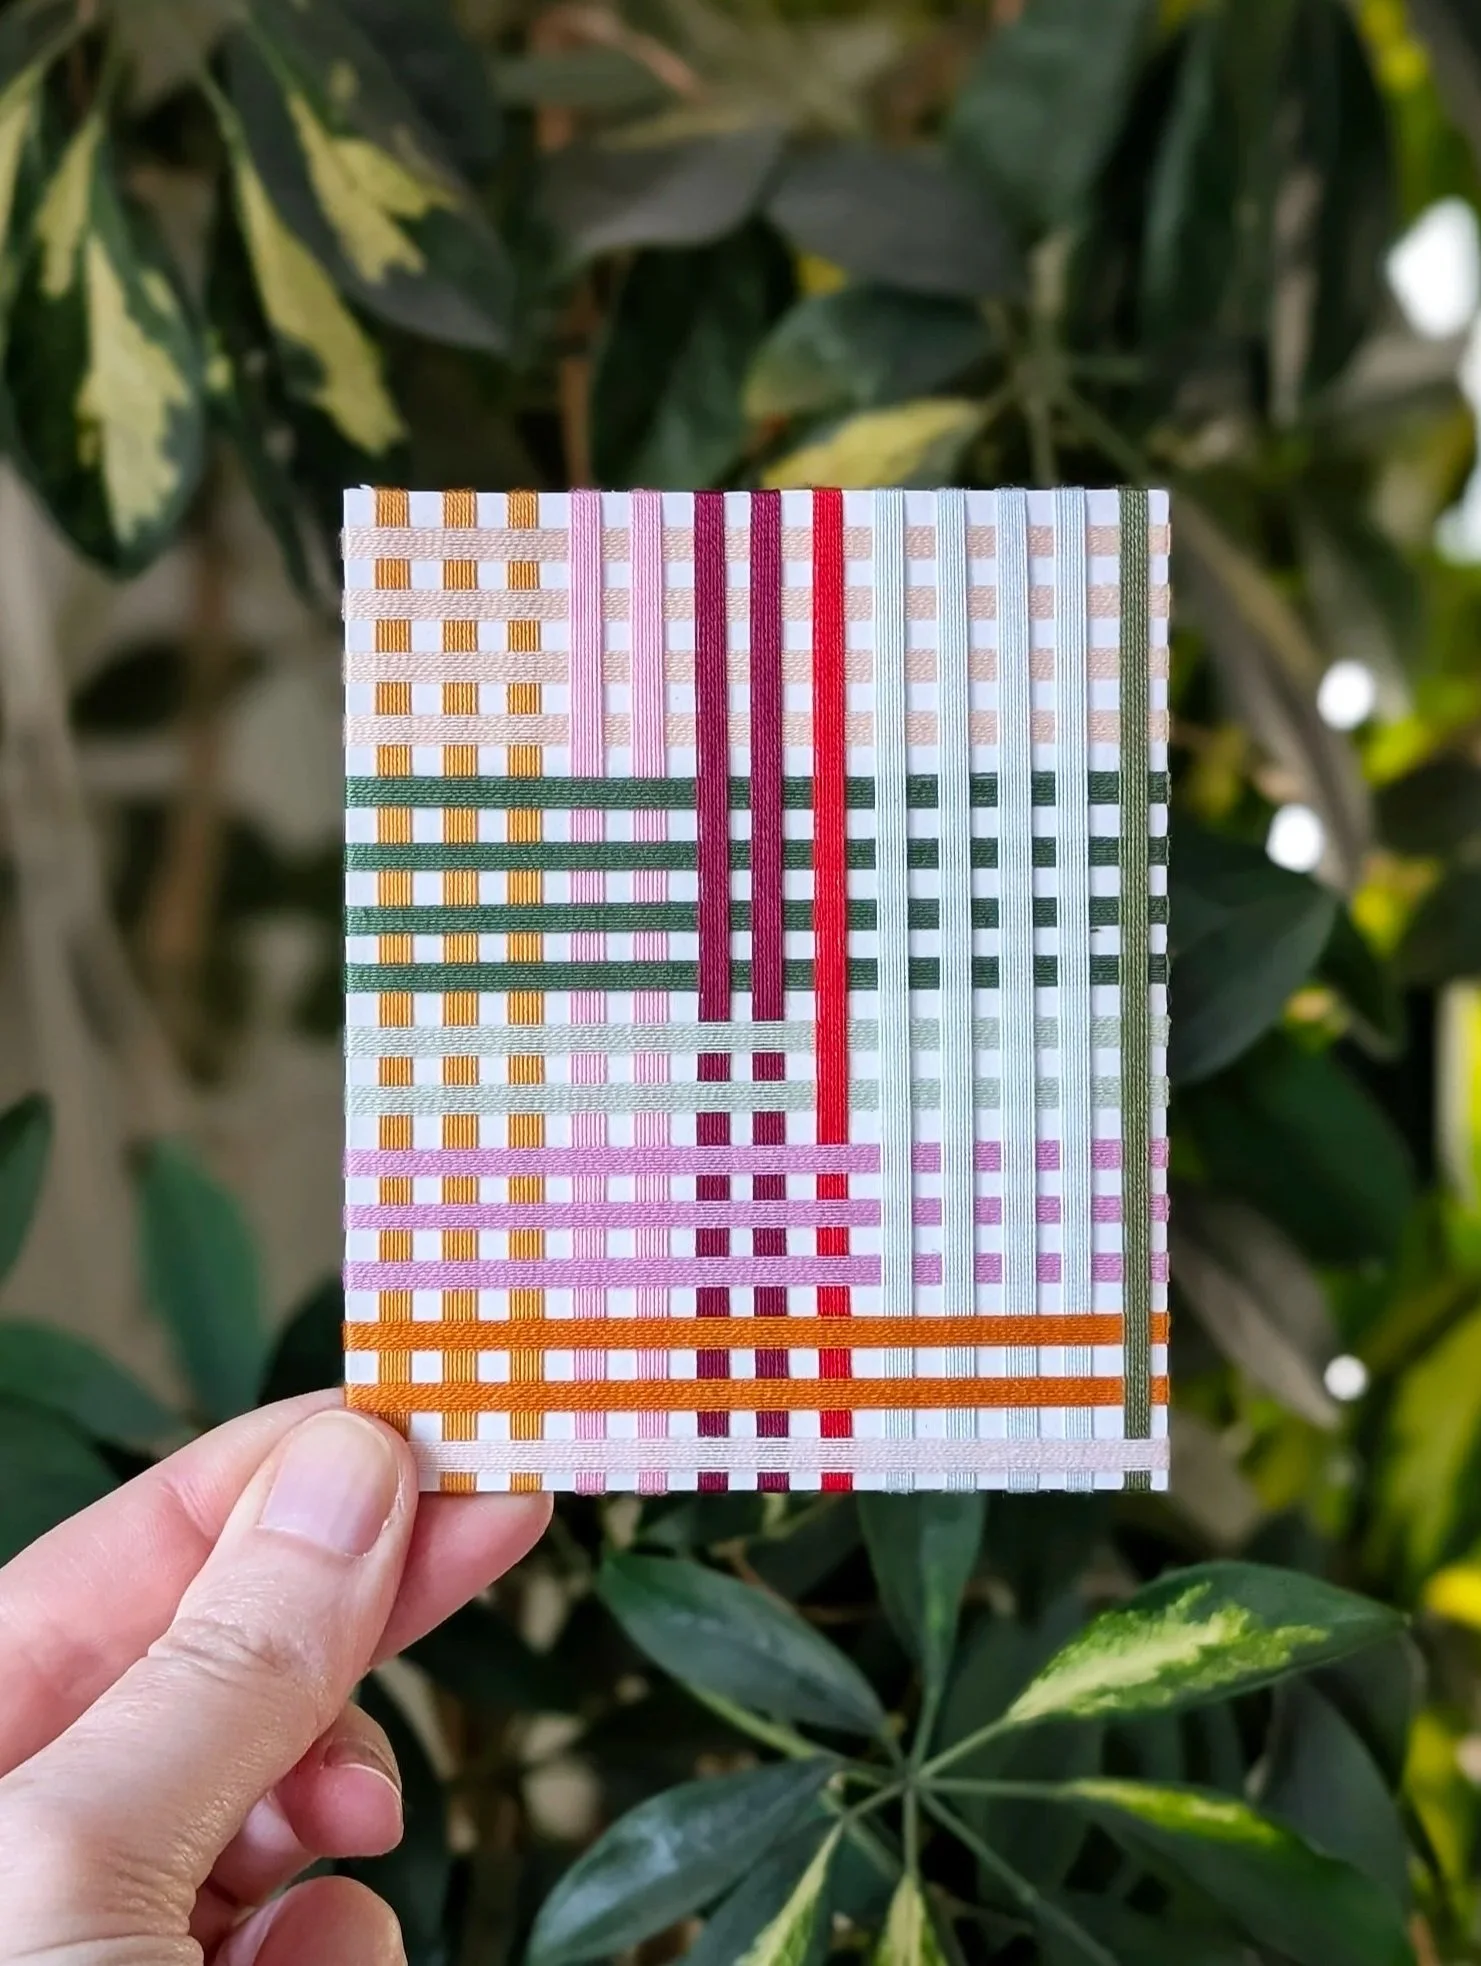
Learn how to make this optical woven pattern, using paper! Great for greetings cards and for framed artworks for the wall.
Paper weaving is a fun and simple way to get to grips with the basics of woven structure, if you’re thinking of learning to weave on a loom.
Weaving can be beneficial for both kids and adults - it is a great way to practice problem solving, develop hand eye coordination, and exercise our fine motor skills.
This design is woven using the 6/6 twill structure, which is essentially ‘over six, under six, over six, under six’ and so on. And, (the fun part) just by changing the order of the colours and the stripes, many variations on the pattern are possible.
The instruction manual is a clear and thorough photographic guide, taking you through each stage, step by step, row by row from start to finish.
You will need:
cutting board
craft knife
metal ruler
a variety of coloured paper or card
double sided adhesive tape
cellotape
scissors
If you didn’t make it to the last online workshop on paper weaving & card making, and would like to participate in the next one, you can book here
Please note - all instruction manuals are included in the price of the workshop, so please do not purchase instruction manuals if you are booked onto a live workshop.
Please also note - These manuals are for your personal use only and are not to be shared or re-sold. Thank you :-)

Learn how to make this optical woven pattern, using paper! Great for greetings cards and for framed artworks for the wall.
Paper weaving is a fun and simple way to get to grips with the basics of woven structure, if you’re thinking of learning to weave on a loom.
Weaving can be beneficial for both kids and adults - it is a great way to practice problem solving, develop hand eye coordination, and exercise our fine motor skills.
This design is woven using the 2/2 twill structure, which is essentially ‘over two, under two, over two, under two’ and so on.
The instruction manual is a clear and thorough photographic guide, taking you through each stage, step by step, row by row from start to finish.
You will need:
cutting board
craft knife
metal ruler
a variety of coloured paper or card
double sided adhesive tape
cellotape
scissors
If you didn’t make it to the last online workshop on paper weaving & card making, and would like to participate in the next one, you can book here
Please note - all instruction manuals are included in the price of the workshop, so please do not purchase instruction manuals if you are booked onto a live workshop.
Please also note - These manuals are for your personal use only and are not to be shared or re-sold. Thank you :-)

Learn how to make this fabulous, colourful zig-zag weave using paper! Great for greetings cards and for framed artworks for the wall.
Paper weaving is a fun and simple way to get to grips with the basics of woven structure, if you’re thinking of learning to weave on a loom.
Weaving can be beneficial for both kids and adults - it is a great way to practice problem solving, develop hand eye coordination, and exercise our fine motor skills.
This design is woven using the 3/3 twill structure, which is essentially ‘over three, under three, over three, under three’ and so on.
‘Twill’ is the structure that creates a diagonal pattern. At a certain point, you’ll be shown how to change the direction of your twill to create the zig zag. Once you’ve grasped this, you can decide where and when to change direction, how long to zig, and how long to zag, creating your own design.
The instruction manual is a clear and thorough photographic guide, taking you through each stage, step by step, row by row from start to finish.
You will need:
cutting board
craft knife
metal ruler
a variety of coloured paper or card
double sided adhesive tape
cellotape
scissors
If you didn’t make it to the last online workshop on paper weaving & card making, and would like to participate in the next one, you can book here
Please note - all instruction manuals are included in the price of the workshop, so please do not purchase instruction manuals if you are booked onto a live workshop.
Please also note - These manuals are for your personal use only and are not to be shared or re-sold. Thank you :-)
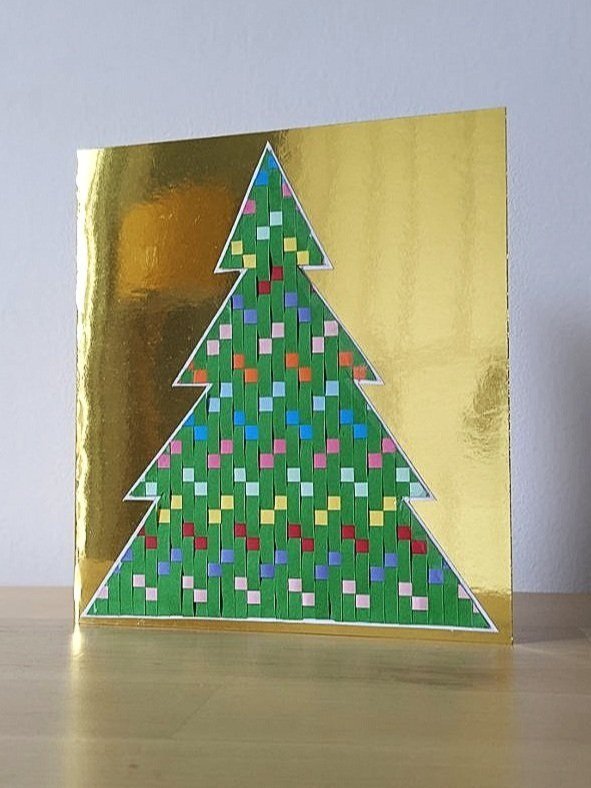
A clear and informative instruction manual on how to make this gorgeous, festive woven tree card!
Paper weaving is also a great way to get to grips with the basics of woven structure, if you’re thinking of learning to weave on a loom.
This instruction manual is a clear and thorough guide through this design, step by step from start to finish.
For this design you will need:
Gold card (or colour of your choice)
An assortment of coloured papers
Sellotape
Double sided adhesive tape
Scissors
Craft Knife
Cutting Board
Metal Ruler
Pencil or Pen
Please note - These manuals are for your personal use only and are not to be shared or re-sold. Thank you ;-)
Darning Manual

Do you have clothes that you’d love to wear again, but they’re stuck in the wardrobe because they need repairs?
Visible mending is great for repairing holes but can also be used to cover stains, and even just to jazz up and customise your clothes! There doesn’t have to be a hole, and believe me once you’ve nailed the technique it can become quite addictive!
This PDF manual contains step by step instructions on how to mend your clothes using woven darning techniques.
Contents:
You Will Need - Materials & Equipment
Different Darning Styles
How To Use An Embroidery Hoop
Stitching Warp Threads Across a Hole
Tying Off Loose Threads With Magic Knot
Starting To Weave
Plain Weave Darn
Twill Darn
Mending Knitted Vs Woven Garments
Darning Mushrooms & Eggs
Mending A Sock
Mending at the Neckline, Cuff or Hem
Other Weaving Patterns; Zig Zag, Herringbone, Hopsack
Inspiration & Tips
Kits will be available again from September 2026.
Please Note:
This manual does not include videos.
This manual is specific to ‘woven’ darning, and does not include Swiss darning techniques.
This learning content is for your personal use only and is not to be shared, re-sold or used for your own teaching purposes. Thank you ;-)